
Finetuning DeepSeek Coder with deepspeed 👨🔧
In this post I will go through the process of finetuning DeepSeek Coder using another top-of-the line tool deepspeed.


DeepSeek Coder is a powerful language model designed specifically for coding tasks. While the base model is already highly capable, finetuning allows you to adapt it to your specific use case or domain.
Also note, DeepSeek-Coder-V2 was released in March-24, and stands out as a cutting-edge code generation model, pushing the boundaries of AI-assisted programming. With its impressive 236B parameter Mixture-of-Experts architecture, it demonstrates remarkable proficiency in understanding and generating code across multiple programming languages. This model excels in tackling complex coding tasks, offering developers a powerful tool that combines vast knowledge with contextual understanding, potentially revolutionizing the way software is developed.
Supports for programming languages from 86 to 338, while extending the context length from 16K to 128K.

The deepseek official library itself has provided script finetune_deepseekcoder.py for users to finetune our models on downstream tasks.
The finetuning process is implemented in the finetune_deepseekcoder.py file, which can be found in the DeepSeek-Coder GitHub repository. This script utilizes the Hugging Face Transformers library and PyTorch to perform the finetuning.
I was able to finetune the 6.7b parameter model using 1 x H100 80GB SXM5 (80 GB VRAM and 251 GB RAM 24 vCPU).
The below script is for training with DeepSpeed. Install required packages using:
pip install -r requirements.txt
Prepare your training data following the Sample Dataset Format. Each line should be a json-serialized string containing instruction and output fields.
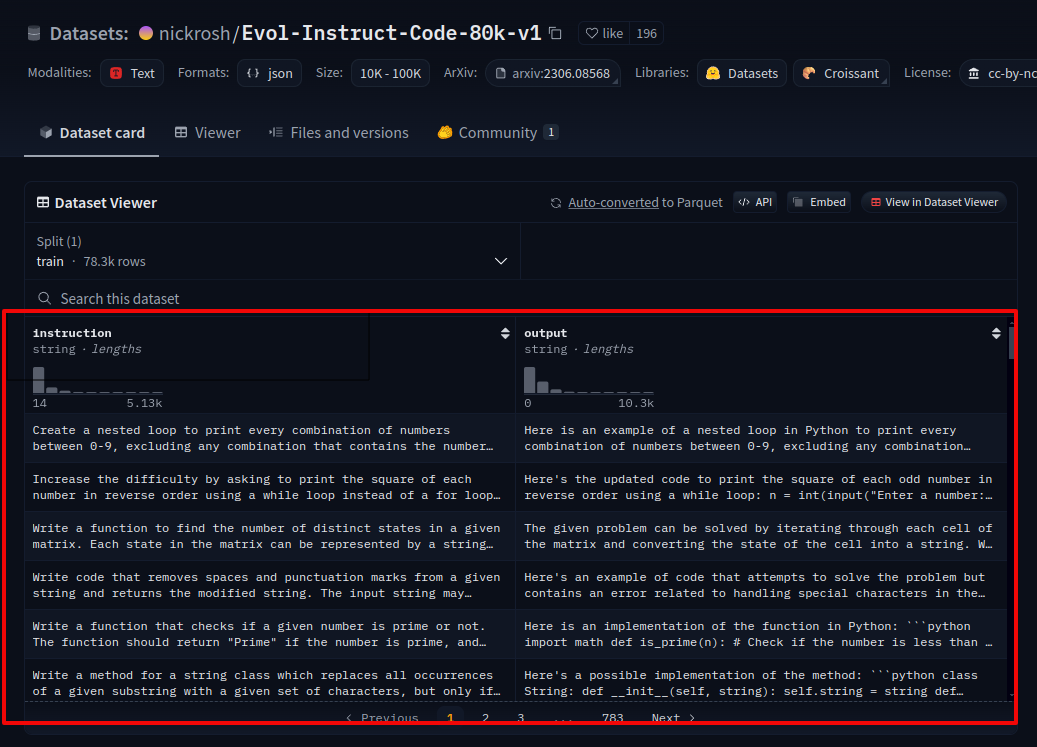
To explain more, each line in the training data file should be formatted as a JSON string containing two key-value pairs:
"instruction": The input or prompt given to the model."output": The expected response or completion from the model.
For example:
{
"instruction": "Write a function to calculate factorial",
"output": "def factorial(n):\n    if n == 0 or n == 1:\n        return 1\n    else:\n        return n * factorial(n-1)"
}
This format allows the model to learn from pairs of instructions and their corresponding outputs during fine-tuning.
To fine-tune deepseek-ai/deepseek-coder-6.7b-instruct, use the sample shell script below. Adjust DATA_PATH, OUTPUT_PATH, and hyperparameters (e.g., learning_rate, per_device_train_batch_size) as needed:
DATA_PATH="<your_data_path>"
OUTPUT_PATH="<your_output_path>"
MODEL_PATH="deepseek-ai/deepseek-coder-6.7b-instruct"

deepspeed finetune_deepseekcoder.py \
    --model_name_or_path $MODEL_PATH \
    --data_path $DATA_PATH \
    --output_dir $OUTPUT_PATH \
    --num_train_epochs 3 \
    --model_max_length 1024 \
    --per_device_train_batch_size 16 \
    --per_device_eval_batch_size 1 \
    --gradient_accumulation_steps 4 \
    --evaluation_strategy "no" \
    --save_strategy "steps" \
    --save_steps 100 \
    --save_total_limit 100 \
    --learning_rate 2e-5 \
    --warmup_steps 10 \
    --logging_steps 1 \
    --lr_scheduler_type "cosine" \
    --gradient_checkpointing True \
    --report_to "tensorboard" \
    --deepspeed configs/ds_config_zero3.json \
    --bf16 True
Key Components of the Finetuning Process
1. Argument Parsing
The script begins by setting up an argument parser to allow customization of various training parameters. Some important arguments include:
model_name_or_path: The base model to finetunedata_path: Path to the training dataoutput_dir: Directory to save the finetuned modelnum_train_epochs: Number of training epochsper_device_train_batch_size: Batch size for traininglearning_rate: Learning rate for the optimizermax_seq_length: Maximum sequence length for input texts
Now lets go through the main file where the whole finetuning process is actually implemented i.e. in this finetune_deepseekcoder.py file
2. Model and Tokenizer Initialization
The script loads the pre-trained DeepSeek Coder model and its associated tokenizer:
model = AutoModelForCausalLM.from_pretrained(
    model_args.model_name_or_path,
    torch_dtype=torch.bfloat16,
    trust_remote_code=True
)
tokenizer = AutoTokenizer.from_pretrained(
    model_args.model_name_or_path,
    trust_remote_code=True
)
3. Data Preparation
The training data is loaded and preprocessed using a custom DataCollatorForCodeCompletionDataset class. This collator handles tokenization and formatting of the input data.
And one of the key method used in this class is the preprocess() method.
def preprocess(
sources: Sequence[str],
targets: Sequence[str],
tokenizer: transformers.PreTrainedTokenizer,
) -> Dict:
"""Preprocess the data by tokenizing."""
examples = [s + t for s, t in zip(sources, targets)]
examples_tokenized, sources_tokenized = [_tokenize_fn(strings, tokenizer) for strings in (examples, sources)]
input_ids = examples_tokenized["input_ids"]
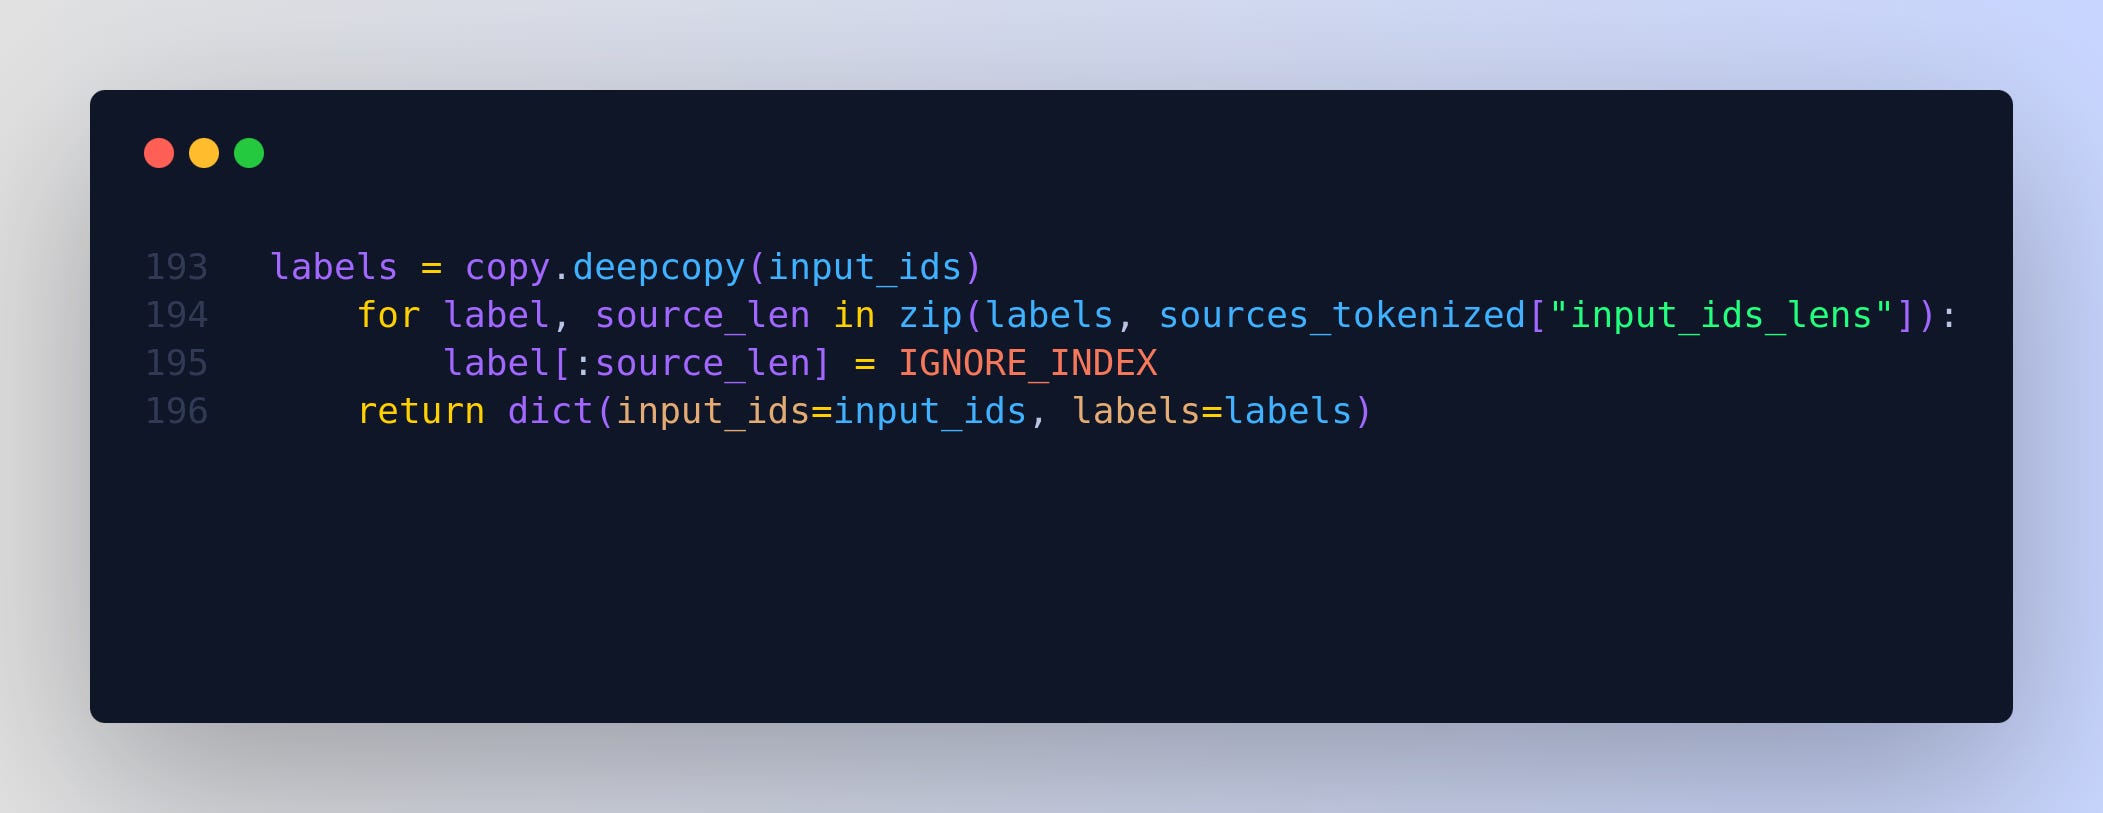
labels = copy.deepcopy(input_ids)
for label, source_len in zip(labels, sources_tokenized["input_ids_lens"]):
label[:source_len] = IGNORE_INDEX
return dict(input_ids=input_ids, labels=labels)
The function's purpose is to preprocess the input data by tokenizing it and preparing it for training.
examples = [s + t for s, t in zip(sources, targets)]
This line creates a list of examples by concatenating each source string with its corresponding target string. This is typically done in language models to create input-output pairs. So in other words, this step concatenates each source (instruction) with its corresponding target (completion). This creates the full sequences that the model will learn from, mimicking the format used during inference where the model generates a completion given an instruction.
examples_tokenized, sources_tokenized = [_tokenize_fn(strings, tokenizer) for strings in (examples, sources)]
Here, the function tokenizes both the examples (concatenated source-target pairs) and the sources alone using a helper function _tokenize_fn (not shown in this snippet). This tokenization converts the text into a format suitable for the model. Tokenizing the sources separately is crucial for creating the labels later.
input_ids = examples_tokenized["input_ids"]
The tokenized input_ids for the examples (source-target pairs) are extracted and stored.
labels = copy.deepcopy(input_ids)
A deep copy of the input_ids is created to serve as the labels. Initially, these labels are identical to the input_ids.
for label, source_len in zip(labels, sources_tokenized["input_ids_lens"]):
    label[:source_len] = IGNORE_INDEX
This loop iterates over each label and the corresponding source length. It sets the first source_len tokens of each label to IGNORE_INDEX. This is a crucial step in the preprocessing:
It ensures that during training, the model is not penalized for predicting the source text (which it's supposed to condition on, not generate).
Only the tokens corresponding to the target text will be used for computing the loss during training.
In other words,
When the model sees "Write a function to add two numbers", it learns to generate "def add(a, b):\n return a + b"
The model isn't penalized for not predicting "Write a function to add two numbers" because those tokens are ignored in the loss calculation
This is the key part of the preprocessing, so lets understand it in more detail:
Labels are initially a copy of input_ids.
For each example, the tokens corresponding to the source (instruction) are set to IGNORE_INDEX (-100).
The purpose of this step is to implement a form of masked language modeling specific to instruction tuning:
During training, the model should only be penalized for incorrect predictions in the target (completion) part.
By setting the label tokens for the instruction part to IGNORE_INDEX, the loss function will ignore these tokens when computing the loss.
This ensures the model learns to generate appropriate completions given the instructions, without trying to predict the instructions themselves.
If you want to understand this block works, more let's go through it with an example. Because, it's so crucial for training instruction-following models and this kind of mechanisms will need to be implemented for many other of your finetuning projects as well.
📌 Purpose
This loop is designed to mask out the tokens corresponding to the instruction part of each example. By setting these tokens to IGNORE_INDEX, we tell the model not to try predicting these tokens during training.
📌 Example Scenario Let's say we have the following instruction-completion pair:
Instruction: "Write a function to add two numbers" Completion: "def add(a, b):\n return a + b"
📌 Step-by-Step Breakdown
Tokenization: Let's assume after tokenization, we have:
Full sequence (instruction + completion) tokens: [101, 2789, 1037, 2774, 2000, 2104, 2048, 2509, 102, 2630, 3190, 1006, 1037, 1010, 1038, 1007, 1024, 2008, 1037, 1010, 1038, 102]
Source (instruction only) tokens: [101, 2789, 1037, 2774, 2000, 2104, 2048, 2509, 102]
Here, 101 and 102 are special tokens (like [CLS] and [SEP]), and the numbers in between represent word pieces.
Initial Labels: Initially,
labelsis a copy ofinput_ids, so it looks exactly like the full sequence above.Masking Loop:
for label, source_len in zip(labels, sources_tokenized["input_ids_lens"]):
    label[:source_len] = IGNORE_INDEX
In this loop:
labelis the full sequence of tokens for one examplesource_lenis the length of the instruction part (9 in our case)IGNORE_INDEXis typically -100
Result After Loop: After this operation, our
labelfor this example would look like: [-100, -100, -100, -100, -100, -100, -100, -100, -100, 2630, 3190, 1006, 1037, 1010, 1038, 1007, 1024, 2008, 1037, 1010, 1038, 102]
📌 Explanation of the Result
The first 9 tokens (corresponding to the instruction) are set to -100 (IGNORE_INDEX)
The remaining tokens (corresponding to the completion) retain their original values
📌 Why This Matters
During training, the loss function will ignore any label with the value -100
This means the model won't try to predict the instruction tokens
The model will only be trained to predict the completion tokens
📌 Training Implication
When the model sees "Write a function to add two numbers", it learns to generate "def add(a, b):\n return a + b"
The model isn't penalized for not predicting "Write a function to add two numbers" because those tokens are ignored in the loss calculation
This approach is crucial for instruction tuning as it teaches the model to generate appropriate responses to instructions rather than simply predicting the next token in a sequence. It allows the model to focus on learning the task of completing prompts, which is the core behavior we want in an instruction-following model like DeepSeek Coder.
return dict(input_ids=input_ids, labels=labels)
Finally, the function returns a dictionary containing the processed input_ids and labels.
In summary, this preprocess function prepares the input data for training a language model by:
Concatenating source and target texts
Tokenizing the concatenated texts and the source texts separately
Creating labels that ignore the source text portion
Returning the processed input_ids and labels
This preprocessing step is crucial for effectively training the model to generate target text based on given source text, while not being penalized for the source text itself.
Now let's understand _tokenize_fn()

def _tokenize_fn(strings: Sequence[str], tokenizer: transformers.PreTrainedTokenizer) -> Dict:
    """Tokenize a list of strings."""
    tokenized_list = [
        tokenizer(
            text,
            return_tensors="pt",
            padding="longest",
            max_length=tokenizer.model_max_length,
            truncation=True,
        )
        for text in strings
    ]

    input_ids = labels = [tokenized.input_ids[0] for tokenized in tokenized_list]
    input_ids_lens = labels_lens = [
        tokenized.input_ids.ne(tokenizer.pad_token_id).sum().item() for tokenized in tokenized_list
    ]

    return dict(
        input_ids=input_ids,
        labels=labels,
        input_ids_lens=input_ids_lens,
        labels_lens=labels_lens,
    )
📌 Function Parameters
strings: A sequence of strings to be tokenizedtokenizer: The tokenizer object from the Transformers library
📌 Extracting Input IDs and Labels
input_ids = labels = [tokenized.input_ids[0] for tokenized in tokenized_list]This line extracts the token IDs for each tokenized string. Note that input_ids and labels are set to the same values here. The actual differentiation between inputs and labels happens later in the preprocess function.
📌 Calculating Sequence Lengths
input_ids_lens = labels_lens = [
    tokenized.input_ids.ne(tokenizer.pad_token_id).sum().item() for tokenized in tokenized_list
]
This calculates the actual length of each sequence, excluding padding tokens:
ne(tokenizer.pad_token_id): Creates a boolean mask where True indicates non-pad tokenssum().item(): Counts the number of True values, giving the length of the non-padded sequence
📌 Return Value
The function returns a dictionary with four key-value pairs:
input_ids: Token IDs for each input stringlabels: Initially the same asinput_ids(will be modified later)input_ids_lens: Lengths of each input sequence (excluding padding)labels_lens: Same asinput_ids_lens(kept separate for potential future use)
📌 Why This Approach Matters
Batch Processing: By tokenizing all strings at once, it allows for efficient batch processing.
Padding and Truncation: Ensures all sequences in a batch have the same length, crucial for batch processing in neural networks.
Length Calculation: Knowing the true length of each sequence (excluding padding) is important for tasks like masking in attention mechanisms.
Flexibility: Keeping
input_idsandlabelsseparate (even though they're initially the same) allows for easy modification later, as seen in thepreprocessfunction.
📌 How we are ensuring Padding and Truncation: Ensures all sequences in a batch have the same length
Here's what's actually happening:
padding="longest": This argument tells the tokenizer to pad sequences to the length of the longest sequence in the current call to the tokenizer. However, this doesn't ensure all sequences across different calls or in the final batch will have the same length.max_length=tokenizer.model_max_length: This sets an upper limit on sequence length, preventing sequences from exceeding the model's maximum input length.truncation=True: This ensures that sequences longer thanmax_lengthare truncated.
📌 The _tokenize_fn() function doesn't actually ensure that all sequences in the final training batch have the same length. It processes each string independently, padding only within the current call to the tokenizer.
The actual padding to a consistent length across the entire batch typically happens later in the training pipeline, often in the data collator or dataloader. In this project, it's implemented in the DataCollatorForSupervisedDataset class:
input_ids = torch.nn.utils.rnn.pad_sequence(
    input_ids, batch_first=True, padding_value=self.tokenizer.pad_token_id
)
This line in the data collator ensures that all sequences in a batch are padded to the same length just before being fed into the model.
📌 Use in Training Pipeline This function is called twice in the preprocess function:
Once for the full sequences (instruction + completion)
Once for just the instruction parts
This dual use allows the training process to:
Have the full sequences for model input
Know the length of the instruction part to create the masked labels
Now the DataCollatorForSupervisedDataset class
@dataclass
class DataCollatorForSupervisedDataset(object):
    """Collate examples for supervised fine-tuning."""
    tokenizer: transformers.PreTrainedTokenizer

    def __call__(self, instances: Sequence[Dict]) -> Dict[str, torch.Tensor]:
        input_ids, labels = tuple([instance[key] for instance in instances] for key in ("input_ids", "labels"))
        input_ids = [torch.tensor(x) for x in input_ids]
        input_ids = torch.nn.utils.rnn.pad_sequence(
            input_ids, batch_first=True, padding_value=self.tokenizer.pad_token_id
        )
        labels = [torch.tensor(x) for x in labels]
        labels = torch.nn.utils.rnn.pad_sequence(labels, batch_first=True, padding_value=IGNORE_INDEX)

        return dict(
            input_ids=input_ids,
            labels=labels,
            attention_mask=input_ids.ne(self.tokenizer.pad_token_id),
        )
The class takes a single parameter:
tokenizer: The tokenizer used for encoding/decoding text
📌 __call__ Method This method makes the class instances callable, allowing them to be used as functions. It's where the main data collation logic resides.
📌 Input Processing
input_ids, labels = tuple([instance[key] for instance in instances] for key in ("input_ids", "labels"))
This line extracts input_ids and labels from each instance in the input sequence.
📌 Tensor Conversion and Padding For both input_ids and labels:
Convert lists to PyTorch tensors
Pad sequences to the same length within the batch
input_ids = [torch.tensor(x) for x in input_ids]
input_ids = torch.nn.utils.rnn.pad_sequence(
    input_ids, batch_first=True, padding_value=self.tokenizer.pad_token_id
)
Key points:
batch_first=True: Ensures the output tensor has shape (batch_size, sequence_length)padding_value: Uses the tokenizer's pad token ID for input_ids and IGNORE_INDEX for labels
📌 Attention Mask Creation
attention_mask=input_ids.ne(self.tokenizer.pad_token_id)
This creates an attention mask where:
1 (True) indicates a non-pad token
0 (False) indicates a pad token
📌 Why This Approach Matters
Dynamic Batching: By padding within the batch, it allows for efficient processing of variable-length sequences.
Memory Efficiency: Padding to the maximum length within a batch (rather than the maximum possible length) saves memory.
Proper Loss Calculation: Using IGNORE_INDEX for label padding ensures that the loss isn't computed on padded tokens.
Attention Masking: The attention mask allows the model to ignore padded tokens during self-attention computations.
4. Training Configuration
The script sets up the training arguments using the TrainingArguments class from the Transformers library. This includes settings for learning rate, batch size, gradient accumulation, and more.
5. Trainer Initialization
A Trainer object is created, which handles the actual training process:
trainer = Trainer(
    model=model,
    args=training_args,
    train_dataset=train_dataset,
    tokenizer=tokenizer,
    data_collator=data_collator,
)
Now let’s move into the train() method that’s responsible to actually execute the training

In the above def train() method the overall workflow is quite regular, but I want to discuss specifically about the purpose and mechanism of this particular below code block.

 if training_args.local_rank == 0:
        torch.distributed.barrier()

    if training_args.local_rank == 0:
        print("Training dataset samples:", len(train_dataset))
        for index in random.sample(range(len(train_dataset)), 3):
            print(f"""Sample {index} of the training set:
                {train_dataset[index]['input_ids']}, {train_dataset[index]['labels']}.""")
            print(f"""Sample {index} of the training set:
            {tokenizer.decode(list(train_dataset[index]['input_ids']))}.""")
It is related to distributed training synchronization and logging. Let's break it down:
📌 Distributed Training Synchronization
if training_args.local_rank == 0:
    torch.distributed.barrier()
This line creates a synchronization point in distributed training:
training_args.local_rank == 0checks if this is the primary process (typically GPU 0)torch.distributed.barrier()is a synchronization primitive that ensures all processes reach this point before any process can proceed
training_args.local_rank is a crucial concept in distributed deep learning training. Let's break it down:
📌 The local_rank is used to identify and differentiate between multiple processes running on different GPUs within a single machine during distributed training.
📌 How it works
When you initiate distributed training, multiple processes are spawned, typically one for each GPU.
Each process is assigned a unique
local_rank, starting from 0.For example, if you're using 4 GPUs on a single machine:
The process on GPU 0 will have
local_rank = 0The process on GPU 1 will have
local_rank = 1And so on...
📌 Usage in the code
Synchronization:
if training_args.local_rank == 0:
    torch.distributed.barrier()
This ensures that only one process (the one with rank 0) calls the barrier, avoiding deadlocks.
torch.distributed.barrier() is a synchronization primitive in PyTorch's distributed computing framework.

📌 Function
It creates a barrier that all processes must reach before any can proceed past it.
Ensures all processes in the distributed training setup are at the same point in execution.
So in more detail
Synchronization Point:
barrier()creates a synchronization point across all processes in a distributed setup.It ensures that all processes reach this point before any of them can proceed further.
Blocking Operation:
When a process calls
barrier(), it blocks (waits) until all other processes in the distributed group have also calledbarrier().This means no process can continue past the barrier until every process has reached it.
Coordination Mechanism:
Internally,
barrier()typically uses a coordination mechanism where each process signals that it has reached the barrier.The barrier is only lifted when all processes have signaled their arrival.
📌 Use Cases
Synchronize data loading across GPUs
Ensure model initialization is complete on all processes
Coordinate logging or checkpoint saving
📌 Importance
Prevents race conditions in distributed training
Ensures consistency across all processes
Critical for maintaining data and model coherence in multi-GPU setups
In essence, torch.distributed.barrier() acts like a checkpoint where all processes wait for each other, ensuring synchronized execution in distributed environments.
Logging:
if training_args.local_rank == 0:
    print("Training dataset samples:", len(train_dataset))
This prevents duplicate logging from multiple processes.
📌 Why it's important
Resource Allocation: It allows the code to assign specific tasks or resources to each GPU.
Avoiding Redundancy: Prevents duplicate operations like data loading or logging.
Coordination: Enables coordinated actions across all processes.
📌 How it's set
The
local_rankis typically set automatically by the distributed training launcher (liketorch.distributed.launchortorchrun).It's passed to the script as a command-line argument and then parsed into
training_args.
📌 Relation to global rank
In multi-node distributed training, there's also a concept of
global_rank.local_rankis specific to GPUs within a single machine.global_rankwould consider all GPUs across all machines.
Understanding and properly using local_rank is crucial for efficient distributed training, ensuring that your code behaves correctly across multiple GPUs and avoiding common pitfalls in parallel processing.
So coming back to this whole block

Purpose:
Ensures that the dataset processing is complete on all GPUs before proceeding
Prevents race conditions where some GPUs might start training before others finish data preparation
Why we are printing the log:
Verification: Allows the user to verify that the dataset has been loaded correctly
Debugging: Provides a sample of the data for debugging purposes
Transparency: Gives insight into the actual content being used for training
📌 Why Only on Rank 0 Both blocks are executed only when training_args.local_rank == 0. This is because:
In distributed training, multiple processes (usually one per GPU) are running simultaneously
We want to avoid duplicate logging from all processes
The primary process (rank 0) is responsible for logging and coordination
📌 Overall Mechanism
All processes prepare the dataset independently
They synchronize at the barrier to ensure all have finished
Only the primary process then logs the dataset information
This ensures consistent logging and prevents data races
This approach is crucial for efficient and coordinated distributed training, ensuring all GPUs have consistent data and start training simultaneously while providing necessary logging for monitoring and debugging.
6. Training Execution
Finally, the training process is initiated:
trainer.train()
Best Practices for Finetuning DeepSeek Coder
Data Quality: Ensure your training data is high-quality and relevant to your target domain. Clean and well-formatted code samples will lead to better results.
Hyperparameter Tuning: Experiment with different learning rates, batch sizes, and number of epochs to find the optimal configuration for your use case.
GPU Resources: Finetuning large language models like DeepSeek Coder requires significant computational resources. Use a machine with a powerful GPU or consider distributed training for faster results.
Evaluation: Implement a robust evaluation strategy to measure the performance of your finetuned model. This could include metrics like perplexity, code completion accuracy, or task-specific benchmarks.
Incremental Finetuning: If you're working with a large dataset, consider finetuning the model incrementally on subsets of your data to avoid overfitting and to better track progress.
Potential Applications
Finetuning DeepSeek Coder can be beneficial for various scenarios:
Domain-Specific Code Generation: Adapt the model to generate code for specific frameworks, libraries, or programming languages.
Custom Coding Style: Train the model to adhere to your organization's coding standards and best practices.
Code Refactoring: Finetune the model to excel at code refactoring tasks for your codebase.
Documentation Generation: Adapt the model to generate high-quality code documentation in your preferred style.
Conclusion
Finetuning DeepSeek Coder allows you to harness the power of this advanced code language model and tailor it to your specific needs. By following the process outlined in the official finetuning script and applying best practices, you can create a customized version of DeepSeek Coder that excels in your target domain or task.
Remember that finetuning is an iterative process, and it may take several attempts to achieve the desired results. Don't hesitate to experiment with different hyperparameters and training data to optimize your model's performance.
Thanks for reading! Feel free to contact me on Twitter or LinkedIn or on my Youtube channel
Would this work for finetuning DeepSeek-Coder-V2 as well please?